While I normally use Linux or Unix as a virtualization platform, with the decision of the General Assembly of my colocation provider Coloclue to allow the Microsoft Windows operating system in her network their wasn’t that much response. Last couple of months however we welcomed a member who is a Windows administrator. This isn’t much of a problem, but we as an association aren’t that familiar with Windows. I used to run Windows Server with Hyper-V before I moved to Coloclue, so I decided to run a little lab environment where we can learn how to configure Windows to run in our Routed network infrastructure.
Coloclue network topology
The Coloclue network is a routed network. We have 2 datacenters which each their own network (/24) where the member servers are located. Each server get 1 IPv4 and 1 IPv6 address from this network, and more addresses will get routed to that shared subnet IP address. This can be done via static route on the Coloclue routers or via BGP on the member’s server.
Hyper-V works great if you have dedicated routers, like VMWare ESXi does. Last couple of years however we support the idea of using a routing VM on ESXi without providing a dedicated vlan for that member. This makes management of the network less complex. VMWare can only host VMs and not a router, Windows Server on the other hand is a complete operating system and does support routing. In this blog post I’d like to write down a how-to how to run Hyper-V virtualization in a routed network. This how-to is based on an article by Hetzner which also uses a routed network.
Windows Host configuration
I’m not going to explain how to install Windows Server or install Hyper-V and install VMs on this platform. The configuration used is a simple server with only 1 ethernet connection. Windows Server 2019 is used in this setup, the steps can be replicated on Windows Server 2012 and Windows Server 2016.
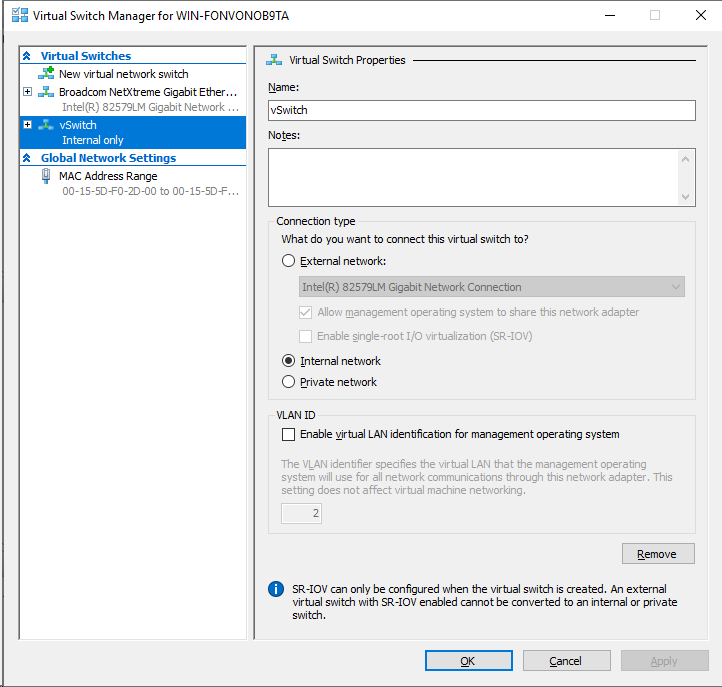
For your VMs you have to use a secondairy network, you can create this network in the Hyper-V Manage. Open the Virtual Switch Manager:
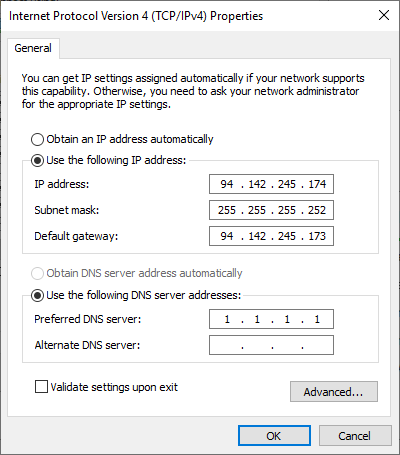
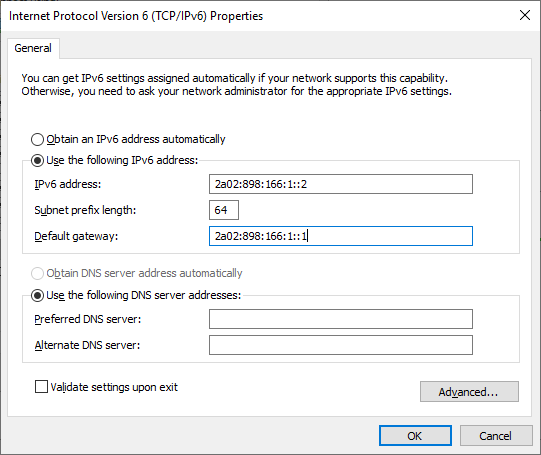
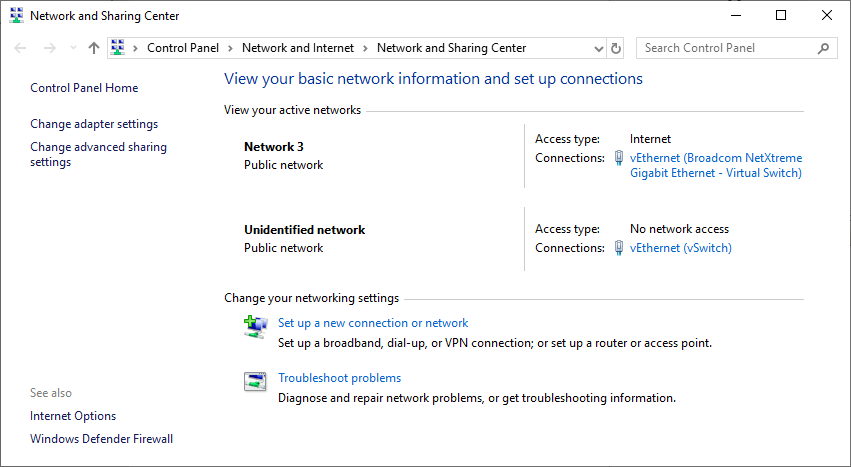
In the Windows Network and Sharing Center you will see your new network adapter, which we can give your internal network settings

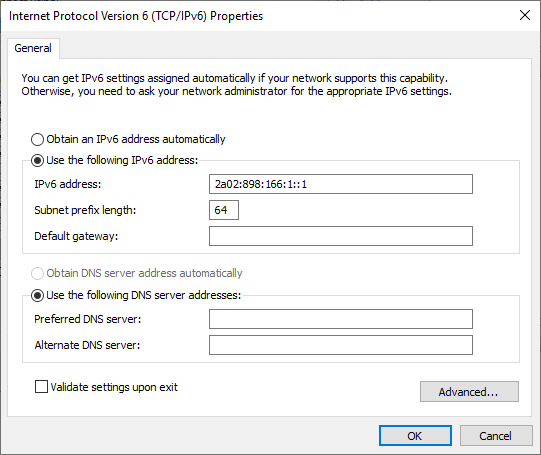
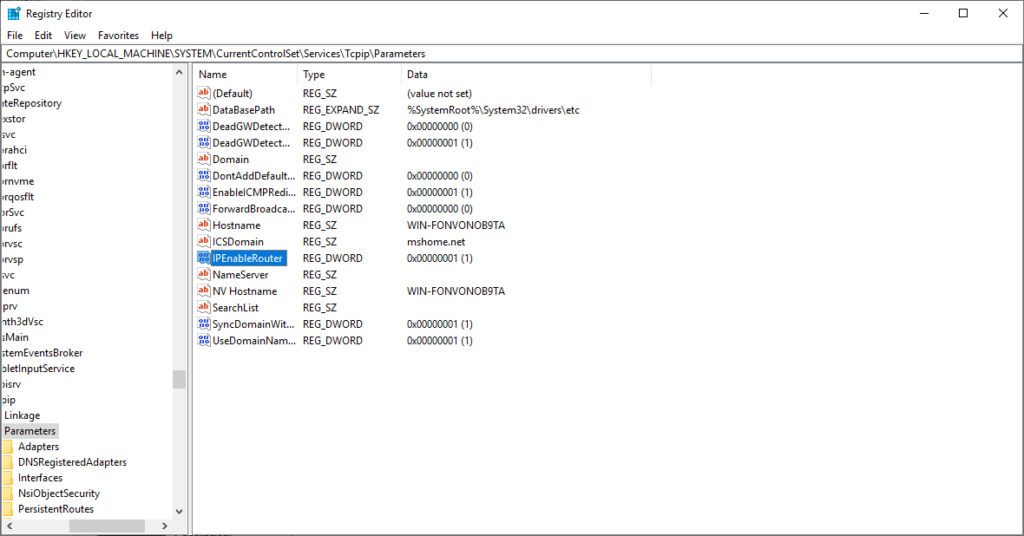
This will provide us with a default gateway for our VMs, however like Linux, Windows won’t route by default, we have to make a registry edit in order to route. In regedit we have to navigate to “HKEY_LOCAL_MACHINE\System\CurrentControlSet\Services\Tcpip\Parameters” and change the IPEnableRouter setting to “1”
With this our host is configured.
Windows Client configuration
The Windows client configuration is straight forward. We have to setup the network adapter, and then everything should work.